When we take our implant planning concept on the road and present our gorgeous work to other dentists we often get asked, but I am placing a single implant, how badly can I mess it up? Why do I need to pay for your surgical guide and planning when I can see with my own eyes where the implants should be placed? We take a deep breath, and begin showing them pictures that we have taken of well-meaning dentists placing implants in god-awful positions. We hope that they understand that to every picture a human being is attached who was expecting a properly placed implant and was expecting to chew with their implants and smile at the world. Here are some pictures we show them:
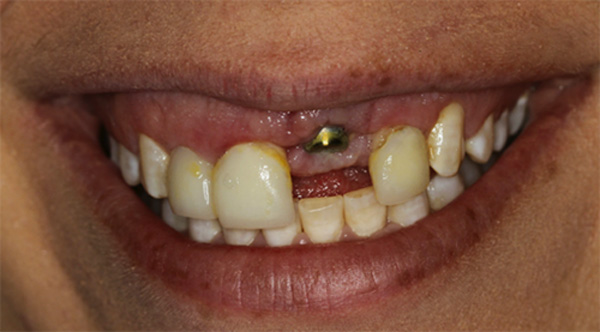
Figure 1: Implant placed too far labially in a high smile line patient
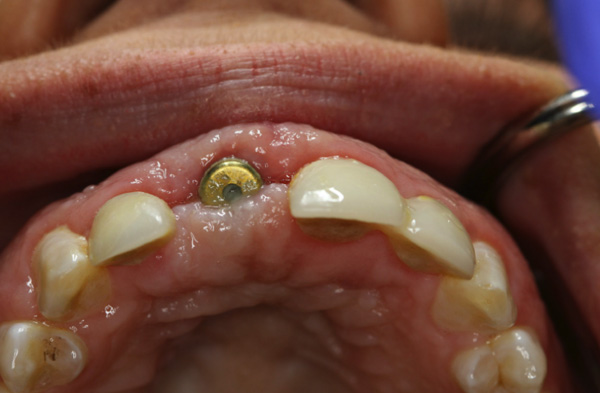
Figure 2: The same implant viewed from the palatal clearly showing a buccal placement.

Figure 3: An implant placed too far superiorly.

Figure 4: Radiograph of the same patient showing an un-restorable implant.
Even if you place the implant in the ballpark of where it is supposed to be, the implant may receive undue cantilever forces upon it. The implant below is placed too far lingually and distally. This implant cannot be restored to have a screw retained crown on top of it. The case would need to be restored with a custom titanium abutment and a cement retained crown on top. Unfortunately, the implant crown will have a potential for a food trap on the mesial and the implant platform will have a significant torque placed upon it every time a piece of food is bit in the mesial fossa.

Figure 5: An implant placed too far lingually and distally causing a cantilever force and food entrapment.
At Implant Genius we believe that even a single implant should be placed using the aid of at least a 2.0 mm starter drill guide. Based on our experience, if the first implant drill osteotomy is performed perfectly, the chances of an implant being placed properly increase significantly. Below are a couple of images of proper implant planning at Implant Genius.

Figure 6: Proper implant planning showing an implant that is parallel to
the adjacent roots and avoiding the inferior alveolar nerve (marked in green).

Figure 7: Implant planning of same patient showing the implant emerging dead-centre on the central fossa.
This implant is planned to be screw retained avoiding problems with cement.

Figure 8: The implant placed successfully for the patient above.
In conclusion, for single implant placement that is easy and safe, we at Implant Genius recommend the use of at least 2.0 mm drill surgical guide as a starting point. If the implant needs to be placed close to a nerve, a sinus or other vital anatomy, we recommend fully guided implant placement. After all, the Genius is in the planning.